Basic Data Management in the de.NBI Cloud
Basic Data Management in the de.NBI Cloud. Intended for a cloud-naive audience.
Overview
Time estimation: 8H
Version: main
Last update: 2026-02-27
Questions:Objectives:
How do you conduct basic data management in the de.NBI Cloud?
Be able to ingress/egress data (as single files or in bulk) into SimpleVM machines.
Be able to ingress/egress data from containers and virtual machines.
Be able to start new virtual machines on the de.NBI Cloud, and attach volumes and containers.
Be able to use object storage on the de.NBI Cloud.
Be able to use advanced object storage operations and SSH-based transfers (parallel transfers, mirroring, resume interrupted transfers).
Part 1: First Contact with the de.NBI Cloud
We will start slowly and get our very first virtual machine instance running in the cloud.
The starting point for this tutorial is the de.NBI Cloud profile page (https://cloud.denbi.de/portal/).
1.1 Create a de.NBI Cloud Account
If you do not have a de.NBI Cloud account, please register for one via this link: https://cloud.denbi.de/register. You can read more about the registration process in our de.NBI Cloud wiki: https://cloud.denbi.de/wiki/registration/. Please make sure to click on “continue” if this button shows up.
If you successfully registered for a de.NBI Cloud account, you should be able to log in to the de.NBI Cloud Portal: https://cloud.denbi.de/portal/.
1.2 Set an SSH key in your account
-
Click on the
Profiletab on the left and scroll down. -
If you have no SSH key set so far, just click on generate key and save the private key. During this workshop you will not need this file because you will access all VMs via the browser. However, for your future work using SimpleVM, we highly recommend to read the de.NBI Cloud wiki regarding SSH keys: https://cloud.denbi.de/wiki/portal/user_information/#ssh-key

- (optional) If you already have a personal SSH key-pair, you can also upload your public key here instead of generating one.
1.3 Join the ib2025workshop1 Project
If you have not done yet, please click on the following link to request access to the project:
The above invitation link will not work after October 2025.
If you have been invited to join a SimpleVM project on the de.NBI Cloud via a link, you may now click on the link and follow the instructions to join the project.
1.4 About the Tools and Prerequisites
In this workshop, we will use several tools that will be pre-installed in your VM through conda environments:
- mash: A fast genome and metagenome distance estimation tool
- parallel: GNU parallel for running jobs in parallel
- fasterq-dump: Part of the SRA Toolkit for converting SRA data
Note: These tools will be available after activating the conda environment
with conda activate denbi (covered later in this workshop).
Note: This workshop uses SimpleVM, which is a simplified interface for the de.NBI Cloud. The full OpenStack Horizon interface has more advanced features but is not required for this workshop.
1.5 Select your project
You start this tutorial from your profile page (https://simplevm.denbi.de).
-
Click on the
New Instancetab. -
If you are already a member of a SimpleVM project then you are offered a drop down menu to select a project. In this case please select the ib2025workshop1 project or your project. If this is your first SimpleVM project, you are now able to select/generate a key (next point) or directly start a VM.
-
If you have no SSH key set so far, just click on generate key and save the private key. During this workshop you will not need this file because you will access all VMs via the browser. However, for your future work using SimpleVM, we highly recommend to read our de.NBI Cloud wiki regarding SSH keys: https://cloud.denbi.de/wiki/portal/user_information/#ssh-key
1.6 Start a VM
-
Choose a name for your VM.
-
Select de.NBI small.
-
In the image section, please click on the Research Environments tab and select the Guacamole image based on Ubuntu 24.04.

-
Select the Conda tab and choose the following tools with their version numbers given below for installation via Conda:
- parallel (20220922)
- sra-tools (3.1.1)
- mash (2.2)

You will learn in the next sections how to apply these tools.
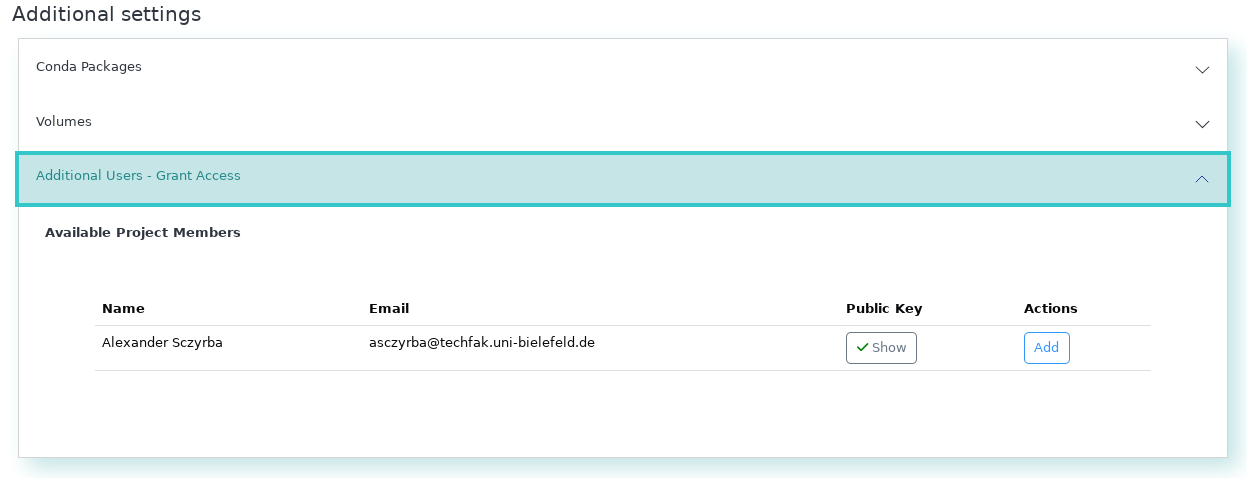
-
Grant access to the workshop organizers (Sebastian Jünemann and Abhijeet Shah), or your collaborators. This way these members get ssh access to your VM and can help you in case something does not work as expected.
-
Optional: Modify the URL path for Guacamole. You will access this VM via this URL.

-
Confirm the checkboxes and click on Start.
Please note: It may take up to 10 minutes or more to spawn an instance and finish running the initial playbook to install and set up all the software we will require.
Section 2: Verify your VM properties and tools
After the start of the machine has been triggered, some time may pass before the machine is available. As soon as this is the case, this becomes visible via a green icon.
Once the VM is available, you can use it for testing the tools and inspecting the data before you start with your analysis in the next section.
2.1 Check your VM
Log in to the VM and verify that SimpleVM provisioned the VM correctly.
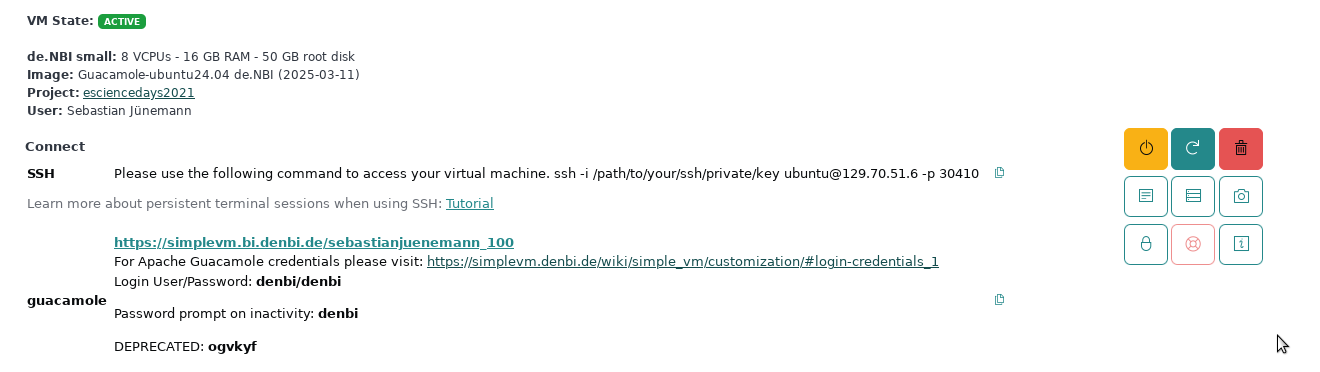
-
After you have initiated the start-up of the machine, you should have been automatically redirected to the Instance Overview page. Now click on the dropdown of your machine. Click on the Guacamole URL which opens a new browser tab.
-
Log into the virtual desktop environment using the credentials:
denbidenbi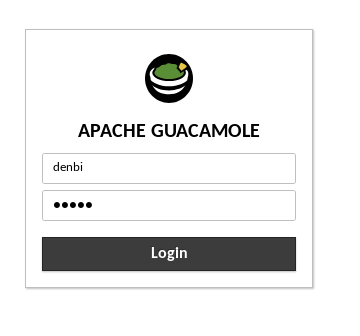
And choose the correct keyboard layout for you.
-
Right click on background and select
Open Terminal Here.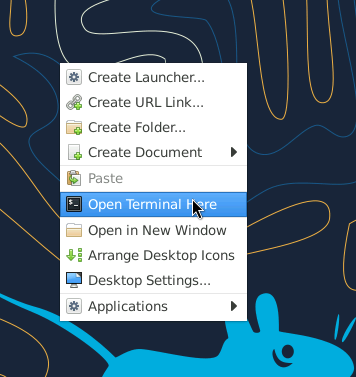
-
Inspect the VM before starting to work with it. Let’s check whether the VM has the properties that SimpleVM promised you by typing the following commands in your newly opened terminal window.
nproctells you the number of processing units.nprocDoes that correspond to the actual number of cores of the flavor you selected?
free -htells you the amount of RAM that is available to your VM. You will see that the sum of the total amount of Mem (totalcolumn,Memrow) corresponds roughly to the RAM size of your selected flavor.free -hYou can also check what kind of processes are running on your VM by executing
toporhtop.htopExit
htopby typingqorF10. -
We have installed some tools previously using the conda environment management. In order to use them, we need to activate this environment. The default environment for using SimpleVM is denbi. To activate this, type
conda activate denbi. -
Test if the needed commands are installed by running all of them with -h parameter. You will get an explanation of their usage in the next chapter.
mash -hparallel -h
If there is an error reported, then something went wrong, and we have to either repeat the conda installation manually or install it a different way.
-
Remember that you have root permissions on the VM. You can install any tool that you need for your research. Let’s test this statement by first fetching the latest information about available packages and installing the following commands (
fortune-mod,cowsay) viasudo.Update:
sudo apt updateInstall the commands:
sudo apt install -y fortune-mod cowsayYou can run both commands via
/usr/games/fortune | /usr/games/cowsayInstall the command-line client for OpenStack
sudo apt install python3-openstackclient
Section 3: Using Horizon OpenStack Interface
We will now use your newly created SimpleVM as a replacement of any given local compute infrastructure you might be working on in your institute (or just for your laptop). Our goal is to transfer data from your site (that is actually the SimpleVM) to your project in the de.NBI Cloud. For that, we also initialize a second instance in the cloud using the openstack interface.
3.1 Opening Horizon
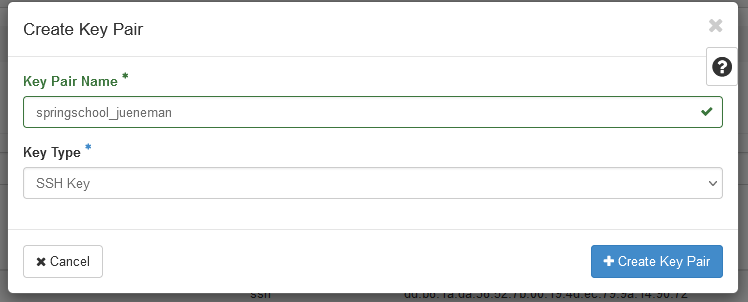
3.2 Create a new Key Pair
- Click on the
Key Pairsentry under theComputemenu and selectCreate Key Pair

- Enter any name and select
SSH Keyas the Key Type.
- The private key will be downloaded automatically to your SimpleVM instance. This instance can be accessed only by you, however, private keys should always have restricted access, which is currently not the case. We will change this now:
mv ~/Downloads/*.pem ~/.ssh
chmod 600 ~/.ssh/*.pem
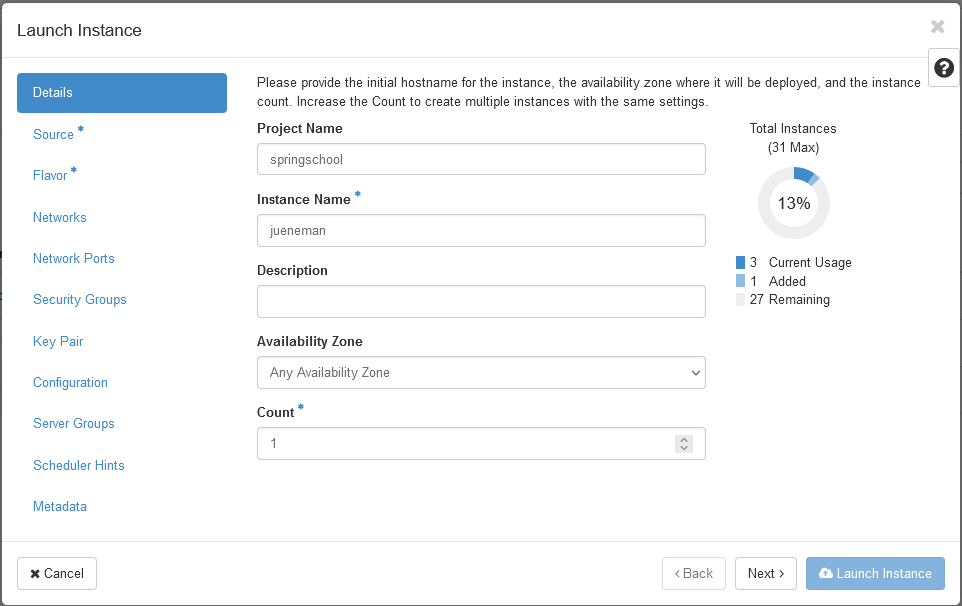
3.3 Start a new instance
We will now go together through the process of creating a new instance using the more powerful yet also more complex interface as provided by openstack horizon.
- Under the
Computemenu, select theInstancesentry and click onLaunch Instance.

- In the first section, you just need to provide an instance name. Please choose your name so that we can identify your VM.
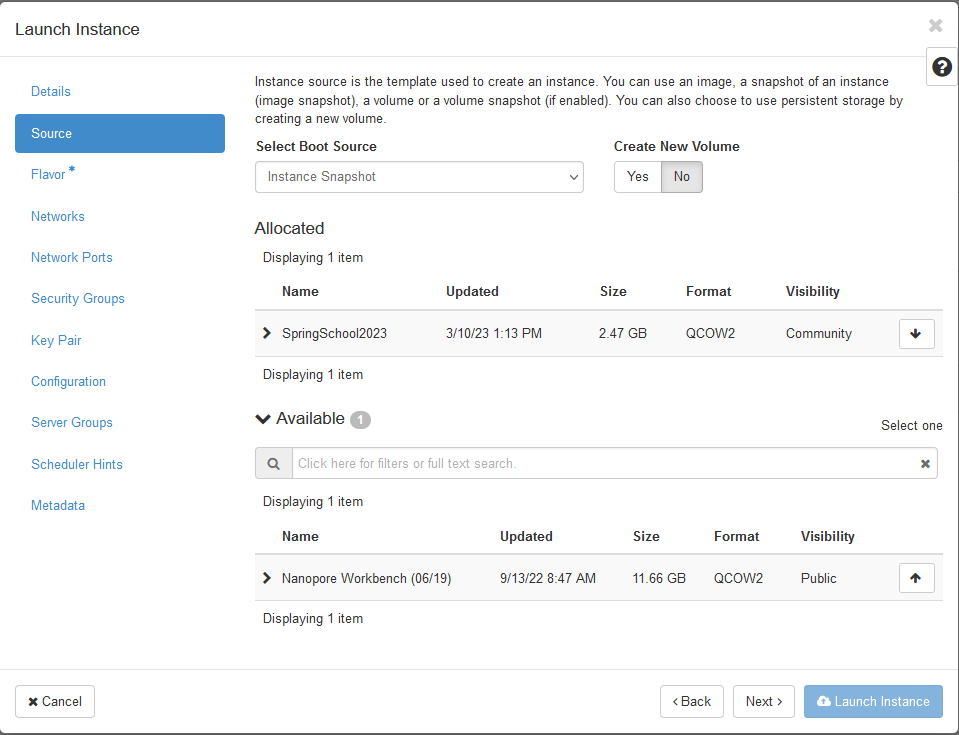
- Then, we need to select a bootable image. In the drop down menu
Select Boot Sourceselect the entryInstance Snapshotupon which the imageRDM Meets Cloud Workshopwill appear in the list below. Click the right up-arrow on that image so that it will be selected.
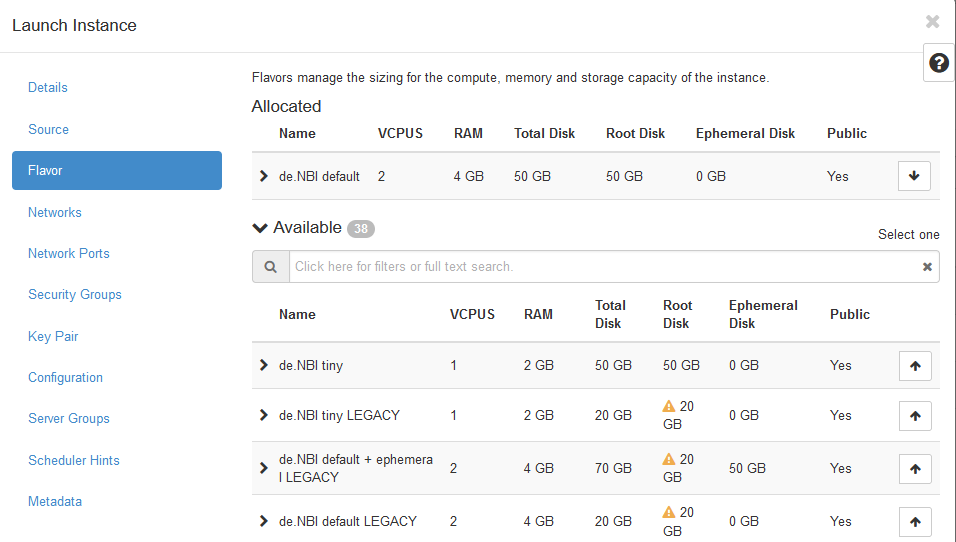
- Next the flavor, i.e. physical virtualization, needs to be chosen.
Here, select the
de.NBI defaultflavor.
- The last option that needs to be selected is the key pair that will
be used for the ssh connection. Select the
Key Pairmenu entry and choose the key pair that you just created in the previous section 3.2.
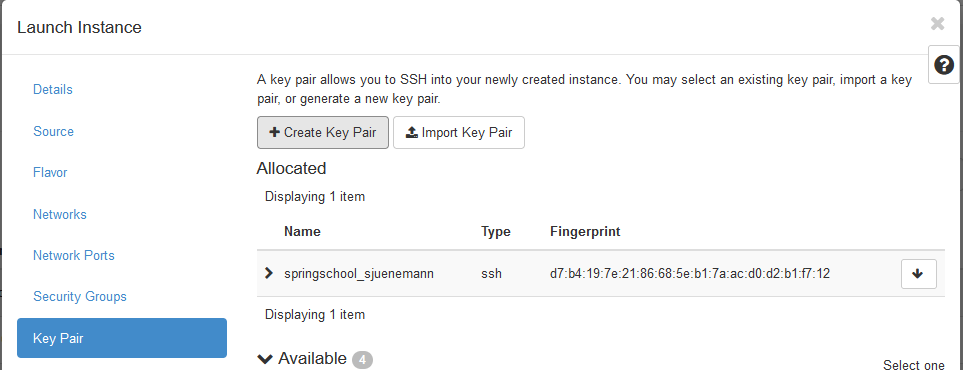
- You can now
Launch the Instance.
3.4 Login to your instance using SSH
- Locate your running instance in the List of instances and note (write down) the last part of the IP address.

Add 30000 to this number (in this example this would be the number 30051). This will be the port that you will be using for the ssh connection.
- In the Guacamole environment, open a terminal (or use any running terminal session) and type the following command:
ssh -i ~/.ssh/*.pem ubuntu@129.70.51.199 -p YOUR_PORT
Note: You need to replace YOUR_PORT with the actual port number you got in the step above!
If everything went without any issue, you should see the following prompt:
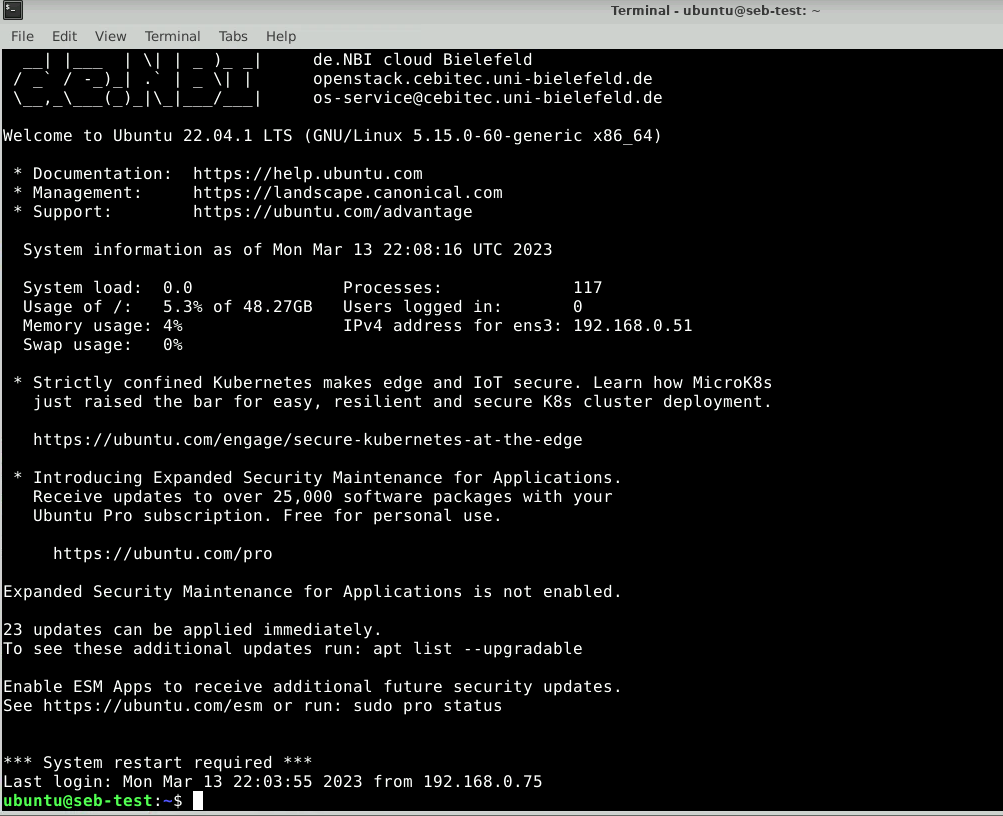
Here, we will create a new folder called data_remote:
mkdir ~/data_remote
Section 4: Using the Object Storage
In this section, we will use the OpenStack Horizon interface directly. Please navigate to the following site:
https://openstack.cebitec.uni-bielefeld.de/project/
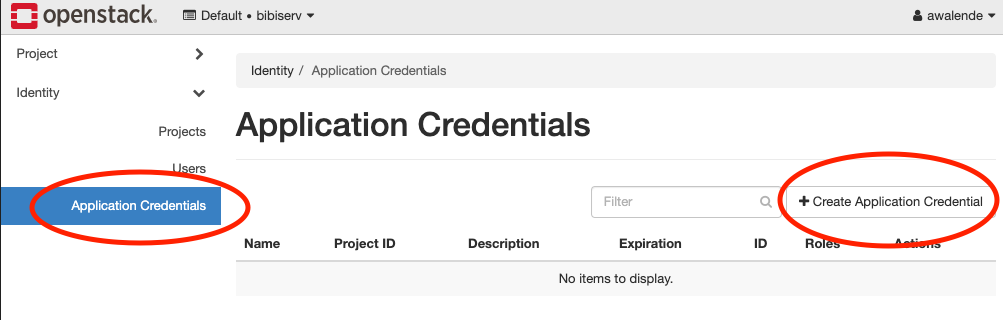
4.1 Creating application credentials
In this section you will create an application
credential
and download the autogenerated clouds.yaml. clouds.yaml contains all
required authentication information. Follow the images:
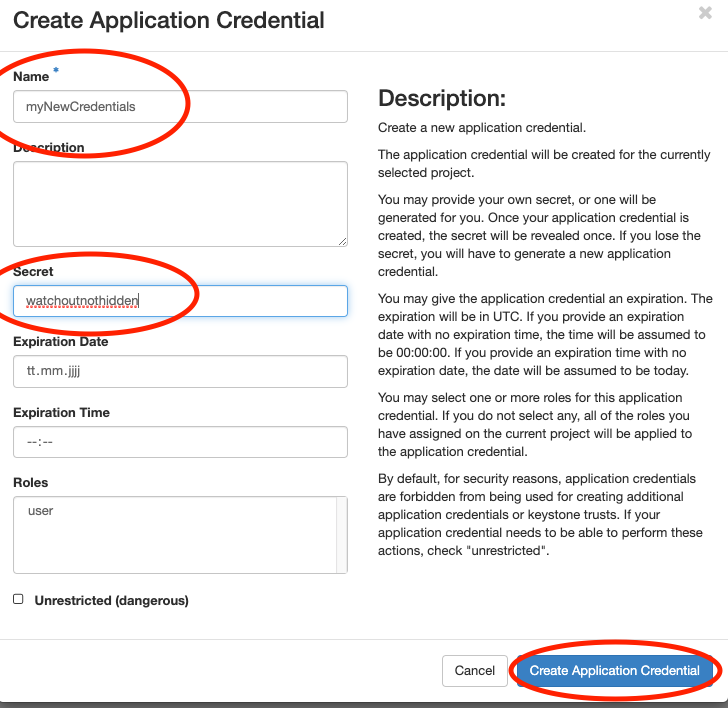
Don’t use the input field secret. As you can see its input is not hidden. OpenStack will generate a strong secret for you, if you leave it blank. You should pick a sensible expiration date.
We will now save the downloaded clouds.yaml under
~/.config/openstack/. That will allow the OpenstackClient to access
it. You will also need the app-cred-openrc.sh script to finish the setup.

If the file was auto downloaded, you need to move it instead:
mkdir -p ~/.config/openstack
mv ~/Downloads/clouds.yaml ~/.config/openstack/
mv ~/Downloads/app-cred*.sh ~/.config/openstack/
chmod 600 ~/.config/openstack/clouds.yaml
chmod 600 ~/.config/openstack/app-cred*.sh
source ~/.config/openstack/app-cred*.sh
If you have OpenstackClient installed and openstack subnet list runs
without error, you are ready to proceed.
openstack project list
openstack project show ib2025openstack1
4.2 Creating S3 credentials
The creation of credentials for the project related object storage can’t be done in the web interface. Therefore, we will use the openstack CLI for that.
openstack --os-identity-api-version 3 ec2 credentials create
This command will return you the newly generated key and secret. You can, at any time, look up what S3 credentials are still valid for you using
openstack --os-identity-api-version 3 ec2 credentials list
We will now configure the S3 MinIO client:
mc alias set ibworkshop https://openstack.cebitec.uni-bielefeld.de:8080/ <YOUR-ACCESS-KEY> <YOUR-SECRET-KEY>
4.3 Uploading data to the Object Storage
We will now use the MinIO client to upload some data. In the Guacamole SimpleVM instance, type:
cd /mnt/volume
We will download some more data to play around with:
mc cp sra/ftp.era.ebi.ac.uk/vol1/fastq/SRR398/008/SRR3984908/SRR3984908_1.fastq.gz .
mc cp sra/ftp.era.ebi.ac.uk/vol1/fastq/SRR398/008/SRR3984908/SRR3984908_2.fastq.gz .
Next, we are going to create a new object storage container, a so-called bucket. For this, we will use the Horizon interface for the first time. Navigate to the Container entry under the Object Store menu entry. Note: All containers here are visible to all project members, as those containers in openstack are bound to the project.
This container is empty, but we can show it nevertheless on the command line using the MinIO client:
mc ls ibworkshop
This should show you your previously created bucket (container) name (next to all others). You can now upload data into it.
mc cp *.fastq.gz ibworkshop/YOUR_CONTAINER_NAME
mc ls ibworkshop/YOUR_CONTAINER_NAME
Tip: You can enable autocompletion for the MinIO client. After activation, the shell needs to be restarted.
mc --autocompletion

4.4 Additional Object Storage Operations
For more advanced work with the SRA mirror and metagenomic datasets analysis, please refer to the de.NBI Cloud SRA mirror documentation.
Here are some additional useful object storage operations:
-
Copy data between buckets:
touch YOUR_NAME.txt wget https://loremipsum.de/downloads/original.txt -O YOUR_NAME.txt mc cp YOUR_NAME.txt ibworkshop/YOUR_CONTAINER_NAME/ mc cp ibworkshop/YOUR_CONTAINER_NAME/YOUR_NAME.txt ibworkshop/example/ -
Mirror large entire directories:
mc cp --recursive aws/sra-pub-run-odp/sra/SRR28001828 ibworkshop/YOUR_CONTAINER_NAME/ -
Set public access for sharing data:
Caution: This will expose your data in the folder to the public internet. You can reverse this by changing the anonymous access policy.
mc anonymous --recursive set download ibworkshop/YOUR_CONTAINER_NAME/public/
Section 5: Advanced Data Transfer Methods
This section covers examples of advanced data transfer techniques for moving data efficiently between cloud instances, object storage containers, and hybrid environments. These methods are particularly useful for large-scale data processing workflows and collaborative research projects. However, these examples do not work out of the box. You will need to modify them for your specific use case.
5.1 Advanced Object Storage Operations
5.1.1 Cross-region data replication
Use Case: You’re collaborating with researchers at different de.NBI sites (Bielefeld, Heidelberg, Gießen, Berlin, etc.) and need to share large metagenomic datasets. Cross-region replication ensures data availability and reduces transfer times.
How it works: Data is automatically synchronized between different de.NBI cloud regions, providing redundancy and faster access for collaborators. This requires access to projects located at multiple sites.
Advantages:
-
Disaster recovery: If one region is unavailable, data remains accessible
-
Collaboration: Multiple teams can work on the same datasets simultaneously
# Configure multiple regions (for example)
mc alias set UniBi https://openstack.cebitec.uni-bielefeld.de:8080/ <ACCESS-KEY> <SECRET-KEY>
mc alias set UniHe https://denbi-cloud.bioquant.uni-heidelberg.de:8080/ <ACCESS-KEY> <SECRET-KEY>

# Replicate data between regions
mc mirror ibworkshop/YOUR_CONTAINER_NAME UniHe/BACKUP_CONTAINER/
5.1.2 Batch operations with MinIO client
Use Case: You have hundreds of sequencing files from different experiments that need to be organized and uploaded to object storage. Manual upload would take hours and be error-prone.
How it works: The MinIO client can process multiple files simultaneously using wildcards and patterns, with built-in progress monitoring and error handling.
Advantages:
-
Time savings: Upload hundreds of files in one command instead of individual uploads
-
Error reduction: Automated pattern matching reduces human errors
-
Progress tracking: Monitor large transfers with real-time progress bars
# Upload multiple file types with wildcards
mc cp /mount/volume/*.{fastq,fna,fa} ibworkshop/YOUR_CONTAINER_NAME/raw_data/

# Download files matching specific patterns
mc find ibworkshop/YOUR_CONTAINER_NAME --name "*.fastq.gz" --exec "mc cp {} ~/downloads/"
5.2 Advanced SSH-based Transfers
5.2.1 Using rsync for efficient transfers
Use Case: You’re regularly updating large datasets (like reference genomes or annotation files) or need to make regular daily or weekly backups.
How it works: Rsync compares file timestamps and sizes, transferring only the differences between source and destination. This is especially efficient for incremental backups and dataset updates.
Advantages:
-
Time efficiency: Updates take minutes instead of hours for large datasets
-
Resume capability: Interrupted transfers can be resumed from where they left off
-
Compression: Built-in compression reduces transfer size and time
# Sync directories between instances
rsync -avz -e "ssh -p YOUR_PORT" ubuntu@YOUR_VM_IP:/mnt/volume/data/  ubuntu@YOUR_OTHER_VM_IP:/PATH/TO/data

# Transfer with compression and progress
rsync -avzP -e "ssh -p YOUR_PORT" ~/large_dataset/ ubuntu@YOUR_VM_IP:/mnt/volume/

# Exclude certain file types.
rsync -avz --exclude="*.tmp" --exclude="*.log" -e "ssh -p YOUR_PORT" ~/data/ ubuntu@YOUR_VM_IP:/mnt/volume/
5.2.2 Parallel transfers with GNU parallel
Use Case: You have thousands of sequencing files that need to be transferred to the cloud, and sequential transfer would take days.
How it works: GNU parallel manages multiple transfer processes simultaneously, utilizing available bandwidth and CPU cores efficiently.
Advantages:
-
Speed: Transfer multiple files simultaneously, utilizing more resources, and improving transfer throughput.
-
Monitoring: Track progress of all transfers simultaneously
# Create a list of files to transfer
find ~/data -name "*.fastq" > files_to_transfer.txt

# Transfer files in parallel (4 at a time)
parallel -j 4 -a files_to_transfer.txt scp -i ~/.ssh/*.pem -P YOUR_PORT {} ubuntu@YOUR_VM_IP:/mnt/volume/
However: It must be noted that doing this puts considerable load on the network interface and network.
5.3 Transfer speed optimization
Use Case: You’re transferring terabytes of sequencing data and need to maximize transfer speeds to meet project deadlines or minimize cloud costs.
How it works: Various techniques can be combined to optimize transfer performance, including parallel connections, compression, and optimized encryption.
Advantages:
-
Time savings: Reduce transfer times by 50-80% through optimization
-
Cost reduction: Faster transfers mean less VM time and lower costs
-
Bandwidth utilization: Make full use of available network capacity
-
Scalability: Techniques work for datasets of any size
# Use multiple connections for faster transfers
mc cp --max-workers 8 aws/sra-pub-run-odp/sra/SRR34093683/SRR34093683  ibworkshop/YOUR_CONTAINER_NAME/

# Compress data during transfer
rsync -avz --compress-level=9 -e "ssh -p YOUR_PORT" ~/data/ ubuntu@YOUR_VM_IP:/mnt/volume/
Key Points
Use the de.NBI Cloud for superior performance for all your research projects.
Key points will appear at the end of the tutorial.
Contributions
Author(s): Abhijeet Shah, Sebastian Juenemann
Editor(s): AS & SJ
Supported by: